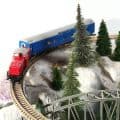
Have you been wondering how to make your own model railroad scenery? Do you find it an intimidating task where a great outcome isn’t necessarily guaranteed? Don’t worry! We are here to help. Here are some pro tips and a step by step guide for how to make scenery for a model railroad, all on your own!
You actually have two choices for wonderful model railroad scenery. You can either choose to buy it on toy train stores, online toy stores such as Amazon and more. But at an expense that it would not come cheap or you can try to build your own in exchange of time, effort and mostly recyclable materials which could be more fun as you can lay out your own idea to fit your imaginative taste.
Most people would rather buy it off some toy train store rather than creating their own due to the fact that they do not have enough confidence in their skills as well as there are not enough pro tips and guides to help them out which is quite understandable as you do not want all those efforts to go to waste with an unsatisfying end result. But reading some tips and slowly trying to learn each step, it is really quite easy and would not leave you with a handful of wasted efforts.
Materials You Need
Building your own scenery of model railroad requires you to have some materials, tool, and accessories. Mostly the ones used in making different arts and crafts, basically anything recyclable such as paper, plastic, wood, metal and colouring materials such as watercolour, spray paint, etc.
As much as possible, things and materials that you might think to be of greater use in creating each parts of a model railroad such as:
- Terrain
- Rock Formations
- Tunnels for your train tracks.
- Roads
- Ground cover
- Ground Goop
- Painting the terrain and rock formations
- Trees
- Bridges
- Water
- Waterfalls
- Ballast
- Walls
- Other details you want
The materials you need are based on what you have in mind for your ideal railroad model scenery. You can based these materials on our list on top if you have not yet have anything in mind of the details you wanted on your railroad model.
Steps, Tips and Instructions in Creating Mountain Terrains for Scenery Model Railroad
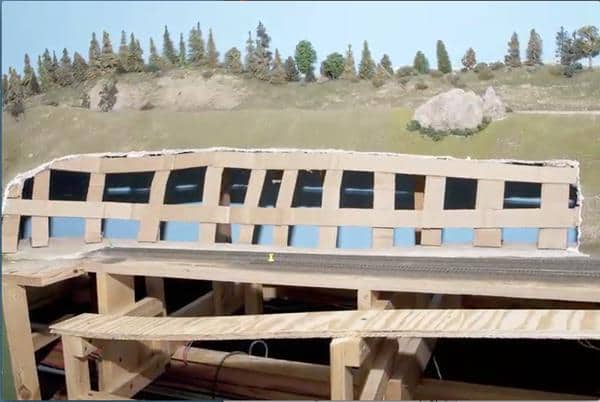
Step 1 – Creating the Foundation
In this step, you can choose between creating layers of card boards for a smooth mountain terrain or a wadded/crumpled newspaper for a rocky mountain terrain.
Using a card board will require you a new set or an old set of used cardboard and a strong/heavy duty scissors or hand-cutter.
- You need to cut the card board to a one inch wide strip, length depending on your judgement and as many as your layout requires you. The quantity will vary on how wide and high you want your mountains to be.
- Start attaching each strip to your platform by folding the bottom of the strip to make it stand or raise.
- Carefully attach each strip to form a web-like structure and dry as seen on the photo. This will make a very strong and solid mountain terrain foundation.
- After drying, you can now apply paper towels or plaster cloth to cover your mountain foundation.
- Once finished and dry, you can now paint and design your mountain terrain depending on your imagination. You can also use a winter setting, covering it with black, brown and white colors.
- Repeat this process or step depending on how many mountains you want in your model railroad layout.
Step 2 – Painting your Mountain Terrain
In step 2 and 3, you need to have and know how to use coloring and detailing materials such as latex paint (colors depending on the type of terrain setting: winter or any other season), paint brush, ground foam where colors also varies on your terrain setting, water spray, water with dish soap, Elmer’s glue, scenery glue or cement, foliage clusters for your trees and brushes and an artificial static grass which is fairly optional.
- After step one is finished, you can now add colors and details. You can start this step by applying your latex paint using your paint brush.
- First, you just need to brush one part of your mountain model, about few inches wide, to be your reference and for you to have a quick grasp of what you are about to design.
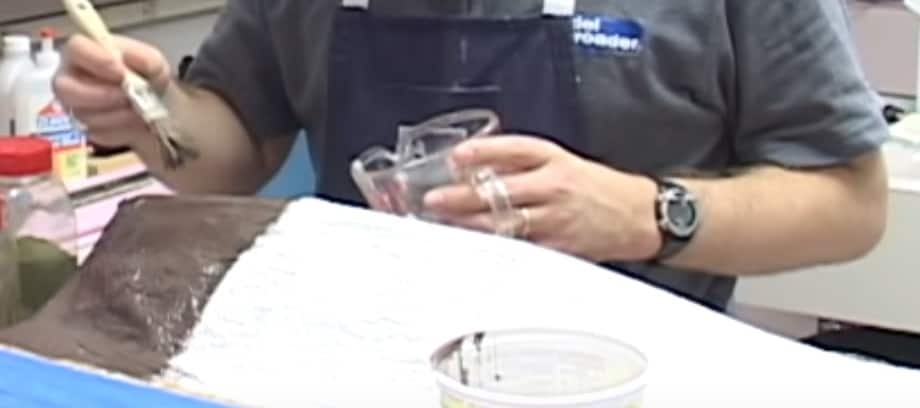
- For non-winter season, use a brown latex paint and brush it all over the designated side. Make sure there are no white spots or never leave some spots unpainted.
- The latex paint might end up thick. Apply some water to make it thin.
- Once done, while the paint is still wet, apply some Elmer’s glue. This technique is cold wet scenery technique as we are applying a new layer while the previous layer is still wet.
- We need the layers and not dried out so we can later on add other details such as our ground foam.
Step 3 – Adding Grass/Vegetation Details
Continuing to step 3, adding vegetation details as we have started to work with non-winter railroad scenery. This is where we will use our ground foam with colors that of a real vegetation such as green, yellow green or dark green and our foliage clusters for our trees and brushes.
- While our layers are still wet, let’s start putting out our ground foam. Preferred color for the first layer of ground foam is earth blend. This is to give our mountain terrain a realistic view of the season.
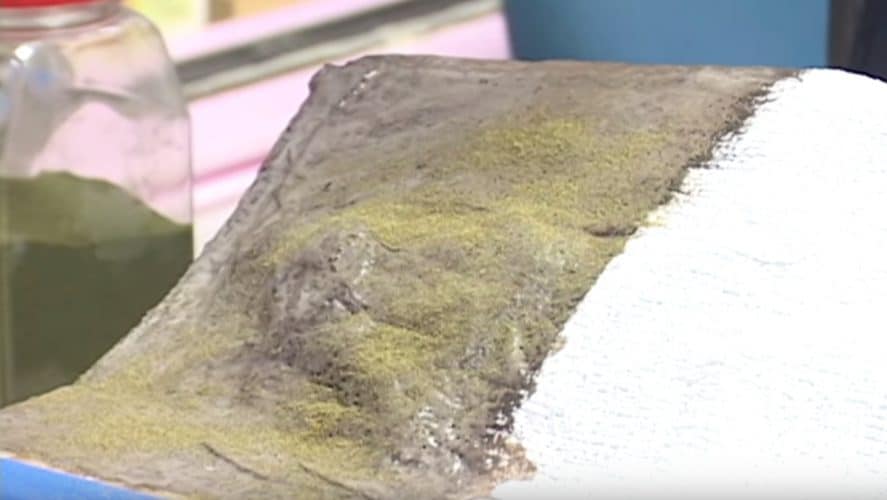
- Gently sprinkle the ground foam on the top of your wet paint and glue layers and make sure that you sprinkle it lightly and moderately as we do not want the brown color to disappear and get fully covered by the earth blend ground foam.
- Next is adding another layer of ground foam. Preferred color is burnt grass. This idea came to mind as mountain or any land field vegetation rarely has one color. You can use other color of ground foam, which ever colors you want for your layout.
- The last layer of ground foam you might want to apply to give it some more texture is a light green color. It makes the grass boast and very realistic.
Step 4 – Finishing the Entire Area of the Mountain Terrain
In this step, after two and three are done, if you think you are satisfied with adding paint and details on one part of your mountain terrain, then you can now continue to fill up the entire area of your terrain by repeating the steps 2 and 3.
Step 5 – Securing Your Base Scenery
The previous layers you have created from step 1 to 4 are your base scenery. You now need to secure it by using your water spray with a combination of water and dish soap and applying your scenery glue.
- First off, you need to spray the water with dish soap lightly, all across your mountain base scenery. You do not need to get it soaked. You just need to get the area wet before applying your glue.
- Next is applying your scenery glue or cement and wet the entire area. For application, you need to have a pipette or an eye-dropper to apply your scenery glue or cement.

- Start dropping glue on the top area of your mountain terrain and let gravity do its work by letting it stream down from top to bottom. Make sure to cover all area of the terrain and cover your base scenery.
- Apply lightly and gently as too much of scenery glue will wash your base scenery off.
Step 6 – Adding Scenic Elements
These scenic elements involve your trees and brushes using your foliage clusters and your artificial static grass. The foliage clusters represents your trees but if you want more realistic details, you can craft and design your own tree and apply it on top of the mountain terrain. The artificial static grass represents your brushes/bushes.
- Start by dipping your foliage clusters unto the glue we have used earlier in the previous steps and placing it, spread across the area of your mountain terrain.
- Placing each cluster requires your judgement regarding how many you need and the position of each.
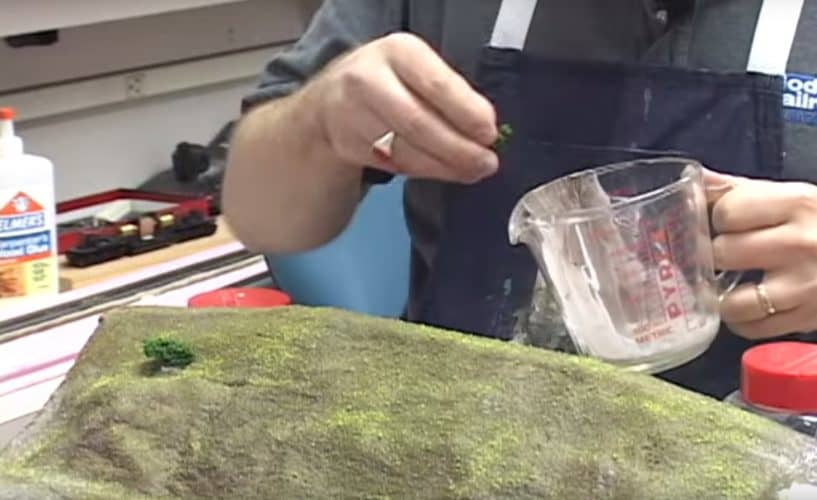
- You can repeat and use this process in applying your static grass for your brush.
Conclusion
We are now done with creating the mountain terrain for our scenery model railroad. I really do hope you have enjoyed our short and concise tutorial. Other types of details you might want to do in your scenery are, again, listed above. There are other tutorials you can refer to in creating your trees, tunnels, roads, etc. One this is certain, the moment you have finished building one type of terrain for your model train scenery will build you the confidence and skills you need to easily create and craft any other elements you want in your model railroad scenery.
You can leave out what you think and share your ideas in our comment section as well as give you the opportunity so share this tip and guide on how to make scenery for model railroad.